Getting started for staff
From a newly activated organization to the first covered shift, in five steps. Do them in this order, because each one rests on the previous one. Everything else — vehicles, checklists, courses, permissions for other managers — can wait until shifts are running.
Info
This page is for whoever administers the organization: the person who registered it, or the one appointed as admin.
Before you start
- The organization must be active: you see it in your Dashboard and you enter it by tapping it. If next to its name you read Organization is awaiting approval, AppToMe has not enabled it yet.
- Use a computer for the setup: the same screens work on the phone, but a big screen is easier to work on.
- One rule applies everywhere: a section's configuration opens from the gear at the top right, inside the section itself. The back arrow, in the same spot, takes you back to everyday work.
1. Create the tasks
Tasks are the roles a person takes on in a shift: Driver, Rescuer, Dispatcher. Everything else uses them: shifts ask for tasks, and a volunteer can only sign up with the tasks they have.
- From the menu open Registry and choose the Tasks tab.
- Add a task, with a Name and a Color: the colour is the one shown on the shift cards.
- Repeat for every role.
To get started, the tasks you actually use are enough. Hierarchies and virtual tasks can wait.
Learn more: Tasks.
2. Bring people in
There are two ways, and you can use both.
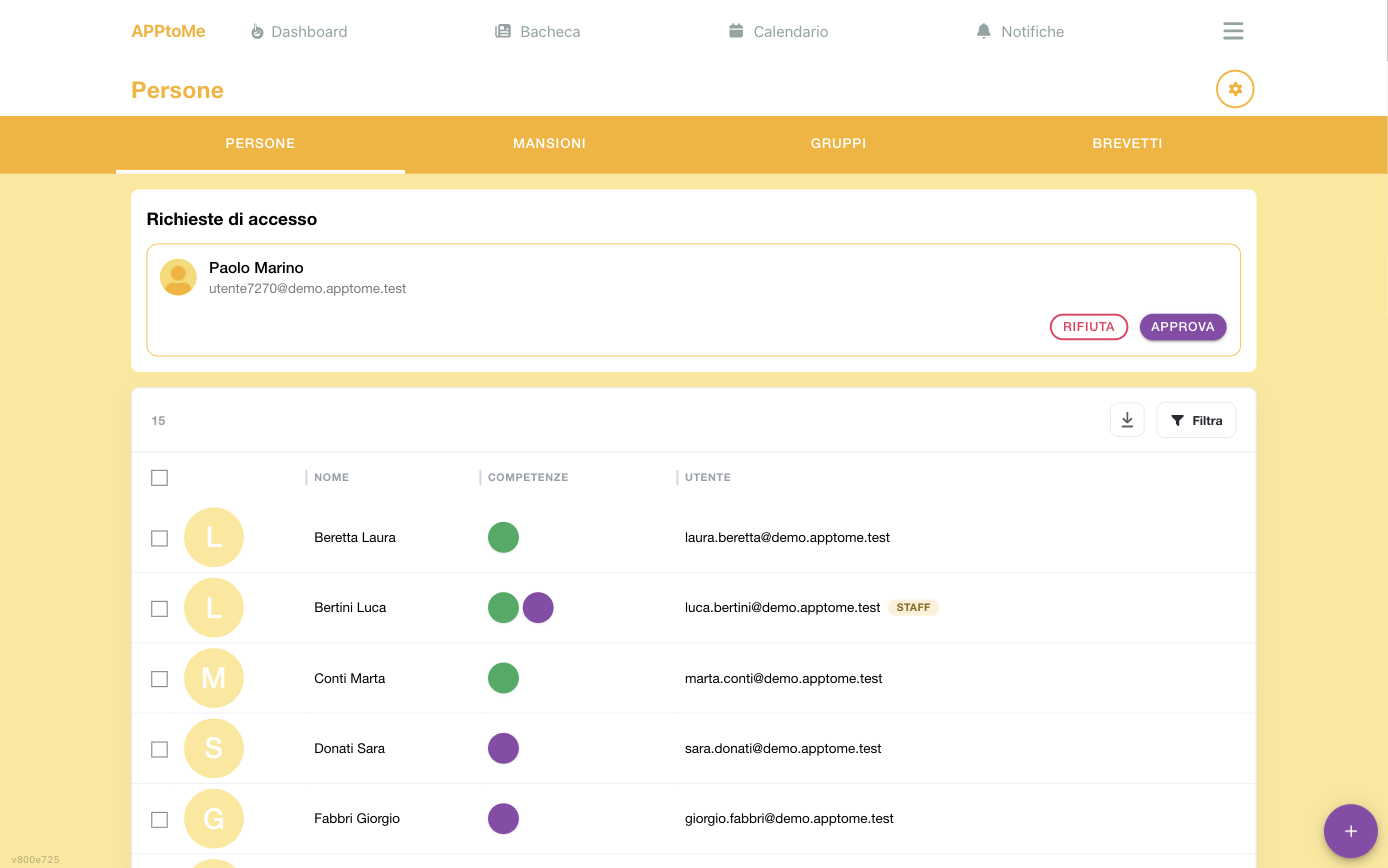
- You invite them — in Registry, People tab, add the person with Name, Surname and Role, then tap Invite on their row and type their email. When they accept, they are in straight away, already linked to their record.
- They ask — volunteers sign up, look for the organization in the app and send a request. You find it in Registry → People, in the Access requests box: approve it with Link to existing person if the record already exists, with Create new person if it does not.
Then give each person their tasks. To do it in one go, in the People list select several rows, choose Action → Add task, the task, and tap Apply.
No tasks, no sign-ups
A volunteer without tasks does not see the button to sign up for any shift. It is the most common cause of the first "it doesn't work".
Learn more: Registry.
3. Create a shift type
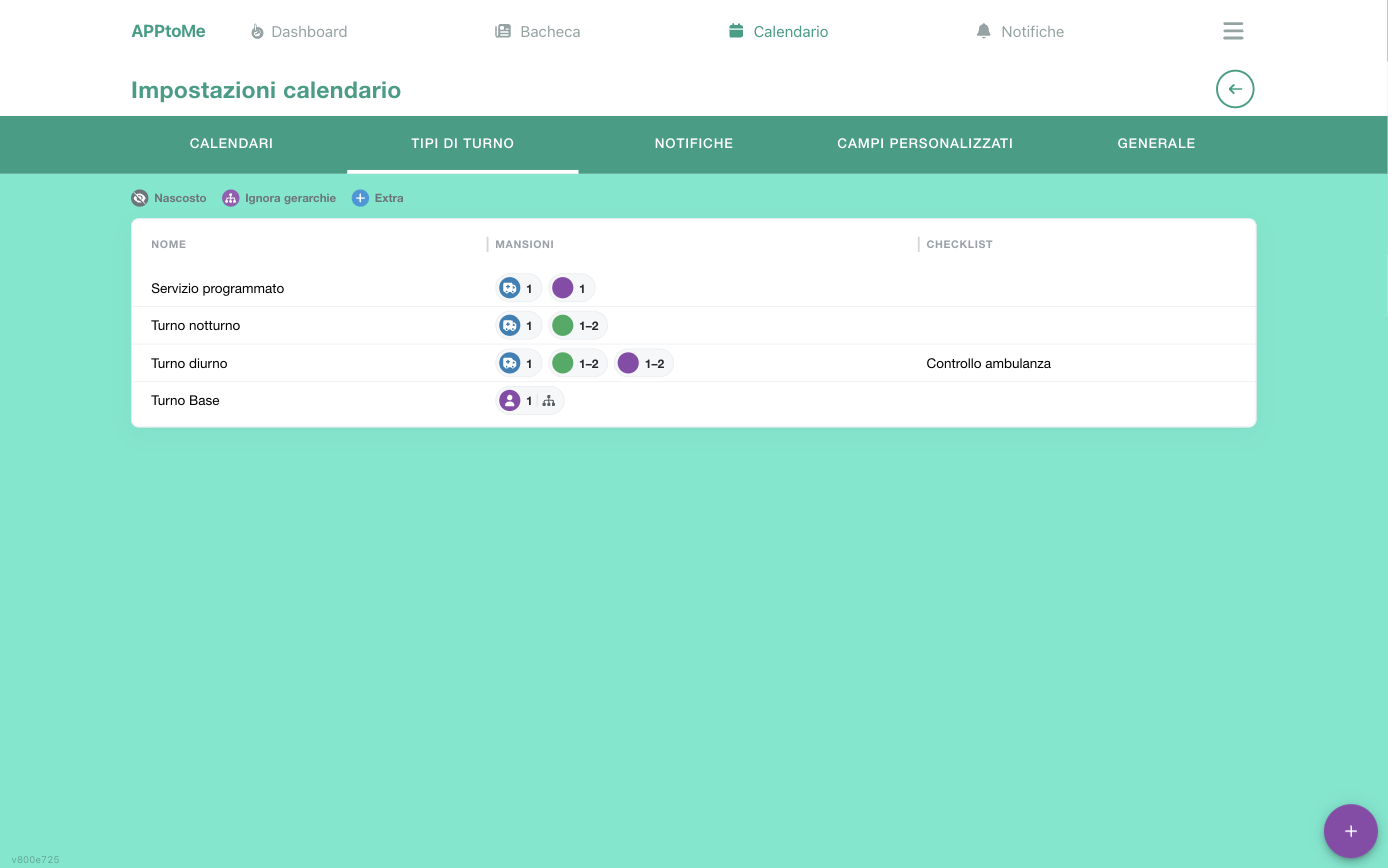
The shift type is the mould: it says how many people are needed and with which tasks.
- Open Calendar and tap the gear at the top right.
- In the Shift types tab add a type and give it a Name (for example Evening service).
- Add the requirements: for each task, a Minimum and a Maximum
(
0= no limit). - Save.
Hidden, Extra and Use hierarchy are for special cases: leave them off for now.
Learn more: Creating a shift type.
4. Create a calendar
- In the same settings open the Calendars tab and add a calendar.
- Give it a Name: Services, Emergency, Civil protection.
- Decide two things:
- Require availability approval — turn it on if you want to personally confirm every volunteer who signs up;
- Min availability lead time and Max availability lead time —
how many days ahead people can sign up (
0= no limit).
- Save. The rest can stay as it is.
Learn more: Creating a calendar.
5. Publish the first shift
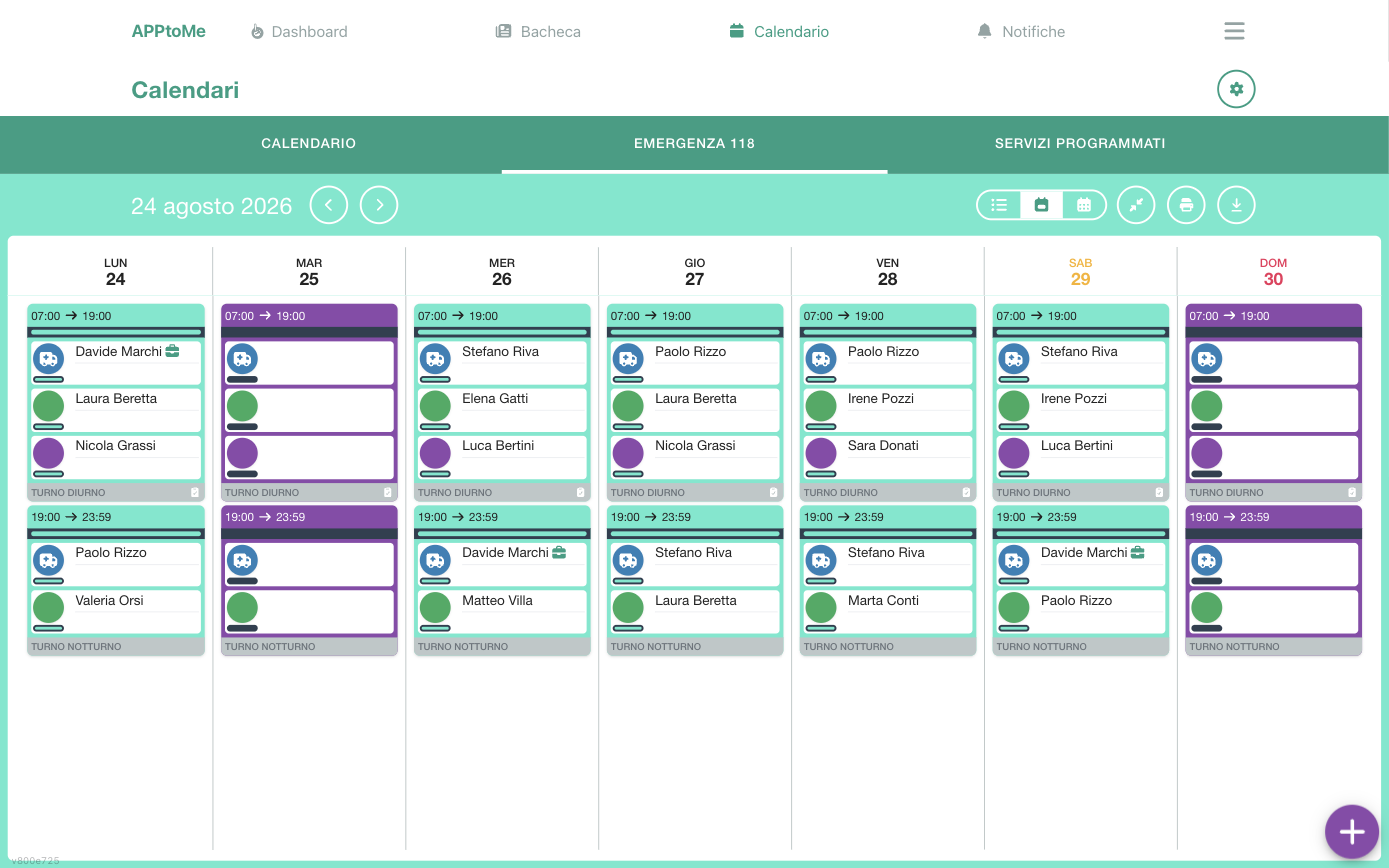
- Use the back arrow to return to the calendar and open the tab of the calendar you created.
- Go to the day and use the add button.
- Choose the Type, the date and the times.
- For a regular service turn on Repeat the shift and choose the days and the end date.
- Save.
The shift is visible right away, and volunteers with the required tasks can sign up. On a single shift, Notify possible candidates also alerts them with a notification.
Learn more: Adding a shift.
The loop is complete
From here on AppToMe works with you:
- volunteers sign up from the app; if the calendar requires approval, you confirm them from the shift with Accept;
- a full shift looks different in the calendar, and uncovered ones stand out at a glance;
- the shift reminder goes out on its own, the day before.
Before announcing it to everyone, do a test: ask a volunteer you trust to sign up for the first shift.
If something does not add up
| What happens | Most common cause |
|---|---|
| A volunteer does not see the button to sign up | they do not have the task the shift type requires |
| A volunteer receives nothing | their record has no linked account: Person and user |
| A shift full of names stays uncovered | availabilities still to be approved, or partial hours: How a requirement is verified |
| A menu entry described in the manuals is missing | the module is not active, or it is part of the full plan |
Then
Once shifts are running, add the rest one piece at a time: other managers (Roles and permissions), the profile and logo of the organization, and the modules — vehicles, checklists, courses, clockings, activities. The Staff guide describes them all.