Checklists
Info
Only available if the organization uses the Checklists module. You need the permission to view checklists; to configure them, the one to manage them.
Checklists are the checks on vehicles and equipment. They are built in two steps: first the checklist type, with its sections and the items to check, then the link to the shift type or to the vehicle.
The settings open from the Checklists section, with the gear at the top right: you find the Checklist types and Notification rules tabs. It is the same pattern as every other section — gear to enter the configuration, back arrow to return to everyday work.
1. Creating the checklist type
The checklist type is the form itself.
| Field | Type | What it does |
|---|---|---|
| Name | text, required | how the checklist appears in the shift |
| Minutes advance tolerance | number, required | how long before the start of the shift it can be started |
| Minutes late tolerance | number, required | how long after the end it stays editable |
The form has two tabs: Summary, with the fields above, and Sections, where the content of the check is built. Every section has a Name and collects the conditions, that is the individual items to check; next to the section's name appears how many items it contains.
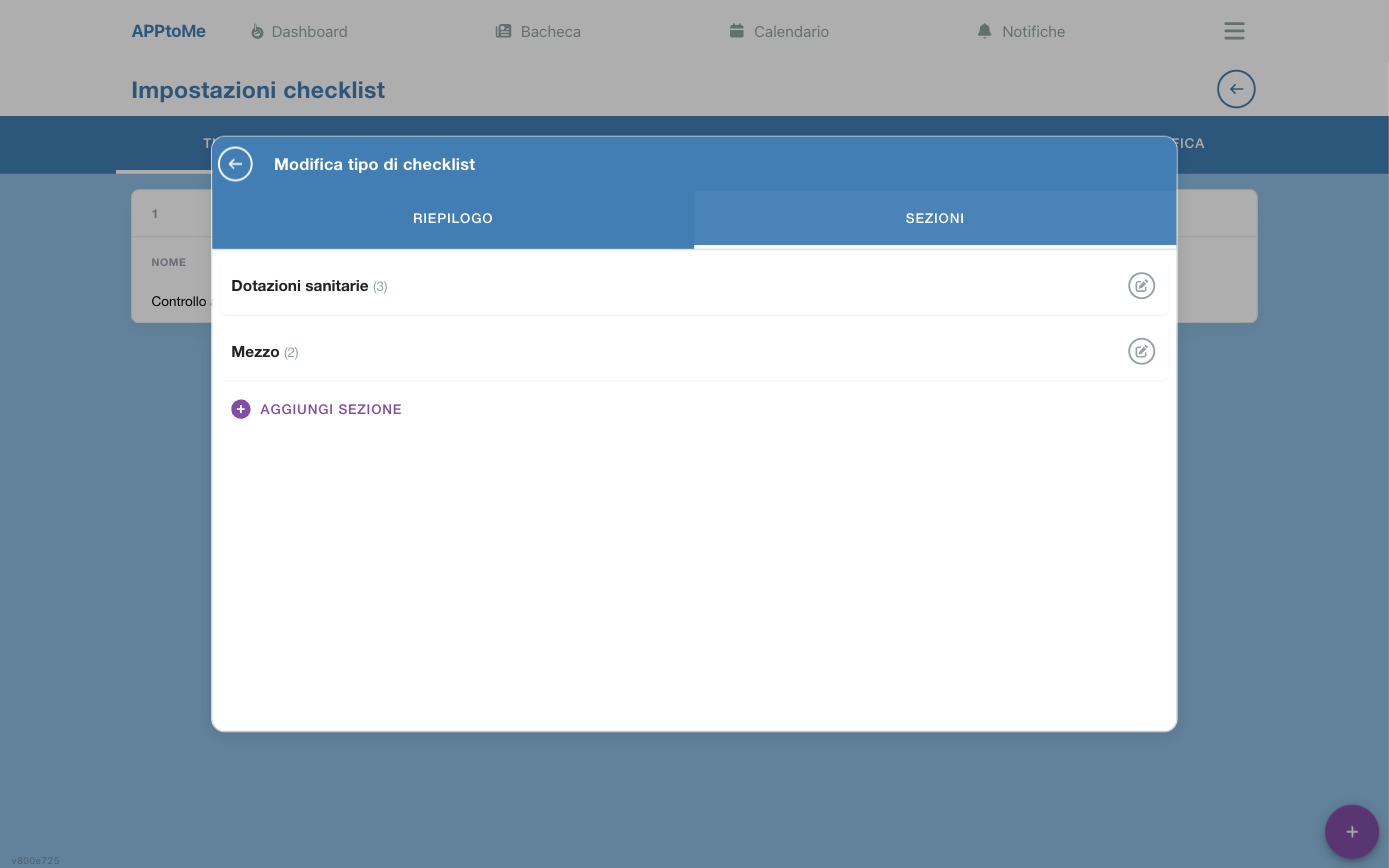
A condition can be:
- Yes / No — the item is there or is not;
- Number — the value has to be between a minimum and a maximum (a cylinder between 100 and 200 bar, fuel above 50%).
Fields of a condition
| Field | Type | What it does |
|---|---|---|
| Condition | text, required | the text of the item, as the person filling in reads it |
| Type | choice | Yes / No or Number |
| Unit | text | the label next to the value (BAR, %, PSI); only for numeric items |
| Min | number | minimum acceptable value |
| Max | number | maximum acceptable value; empty = no upper limit |
| Description | long text | instructions on what to check, shown under the item |
The Type decides how it is filled in: a Yes / No item is ticked, a Number item is measured and compared with Min and Max. Choosing it well avoids ambiguous checklists.
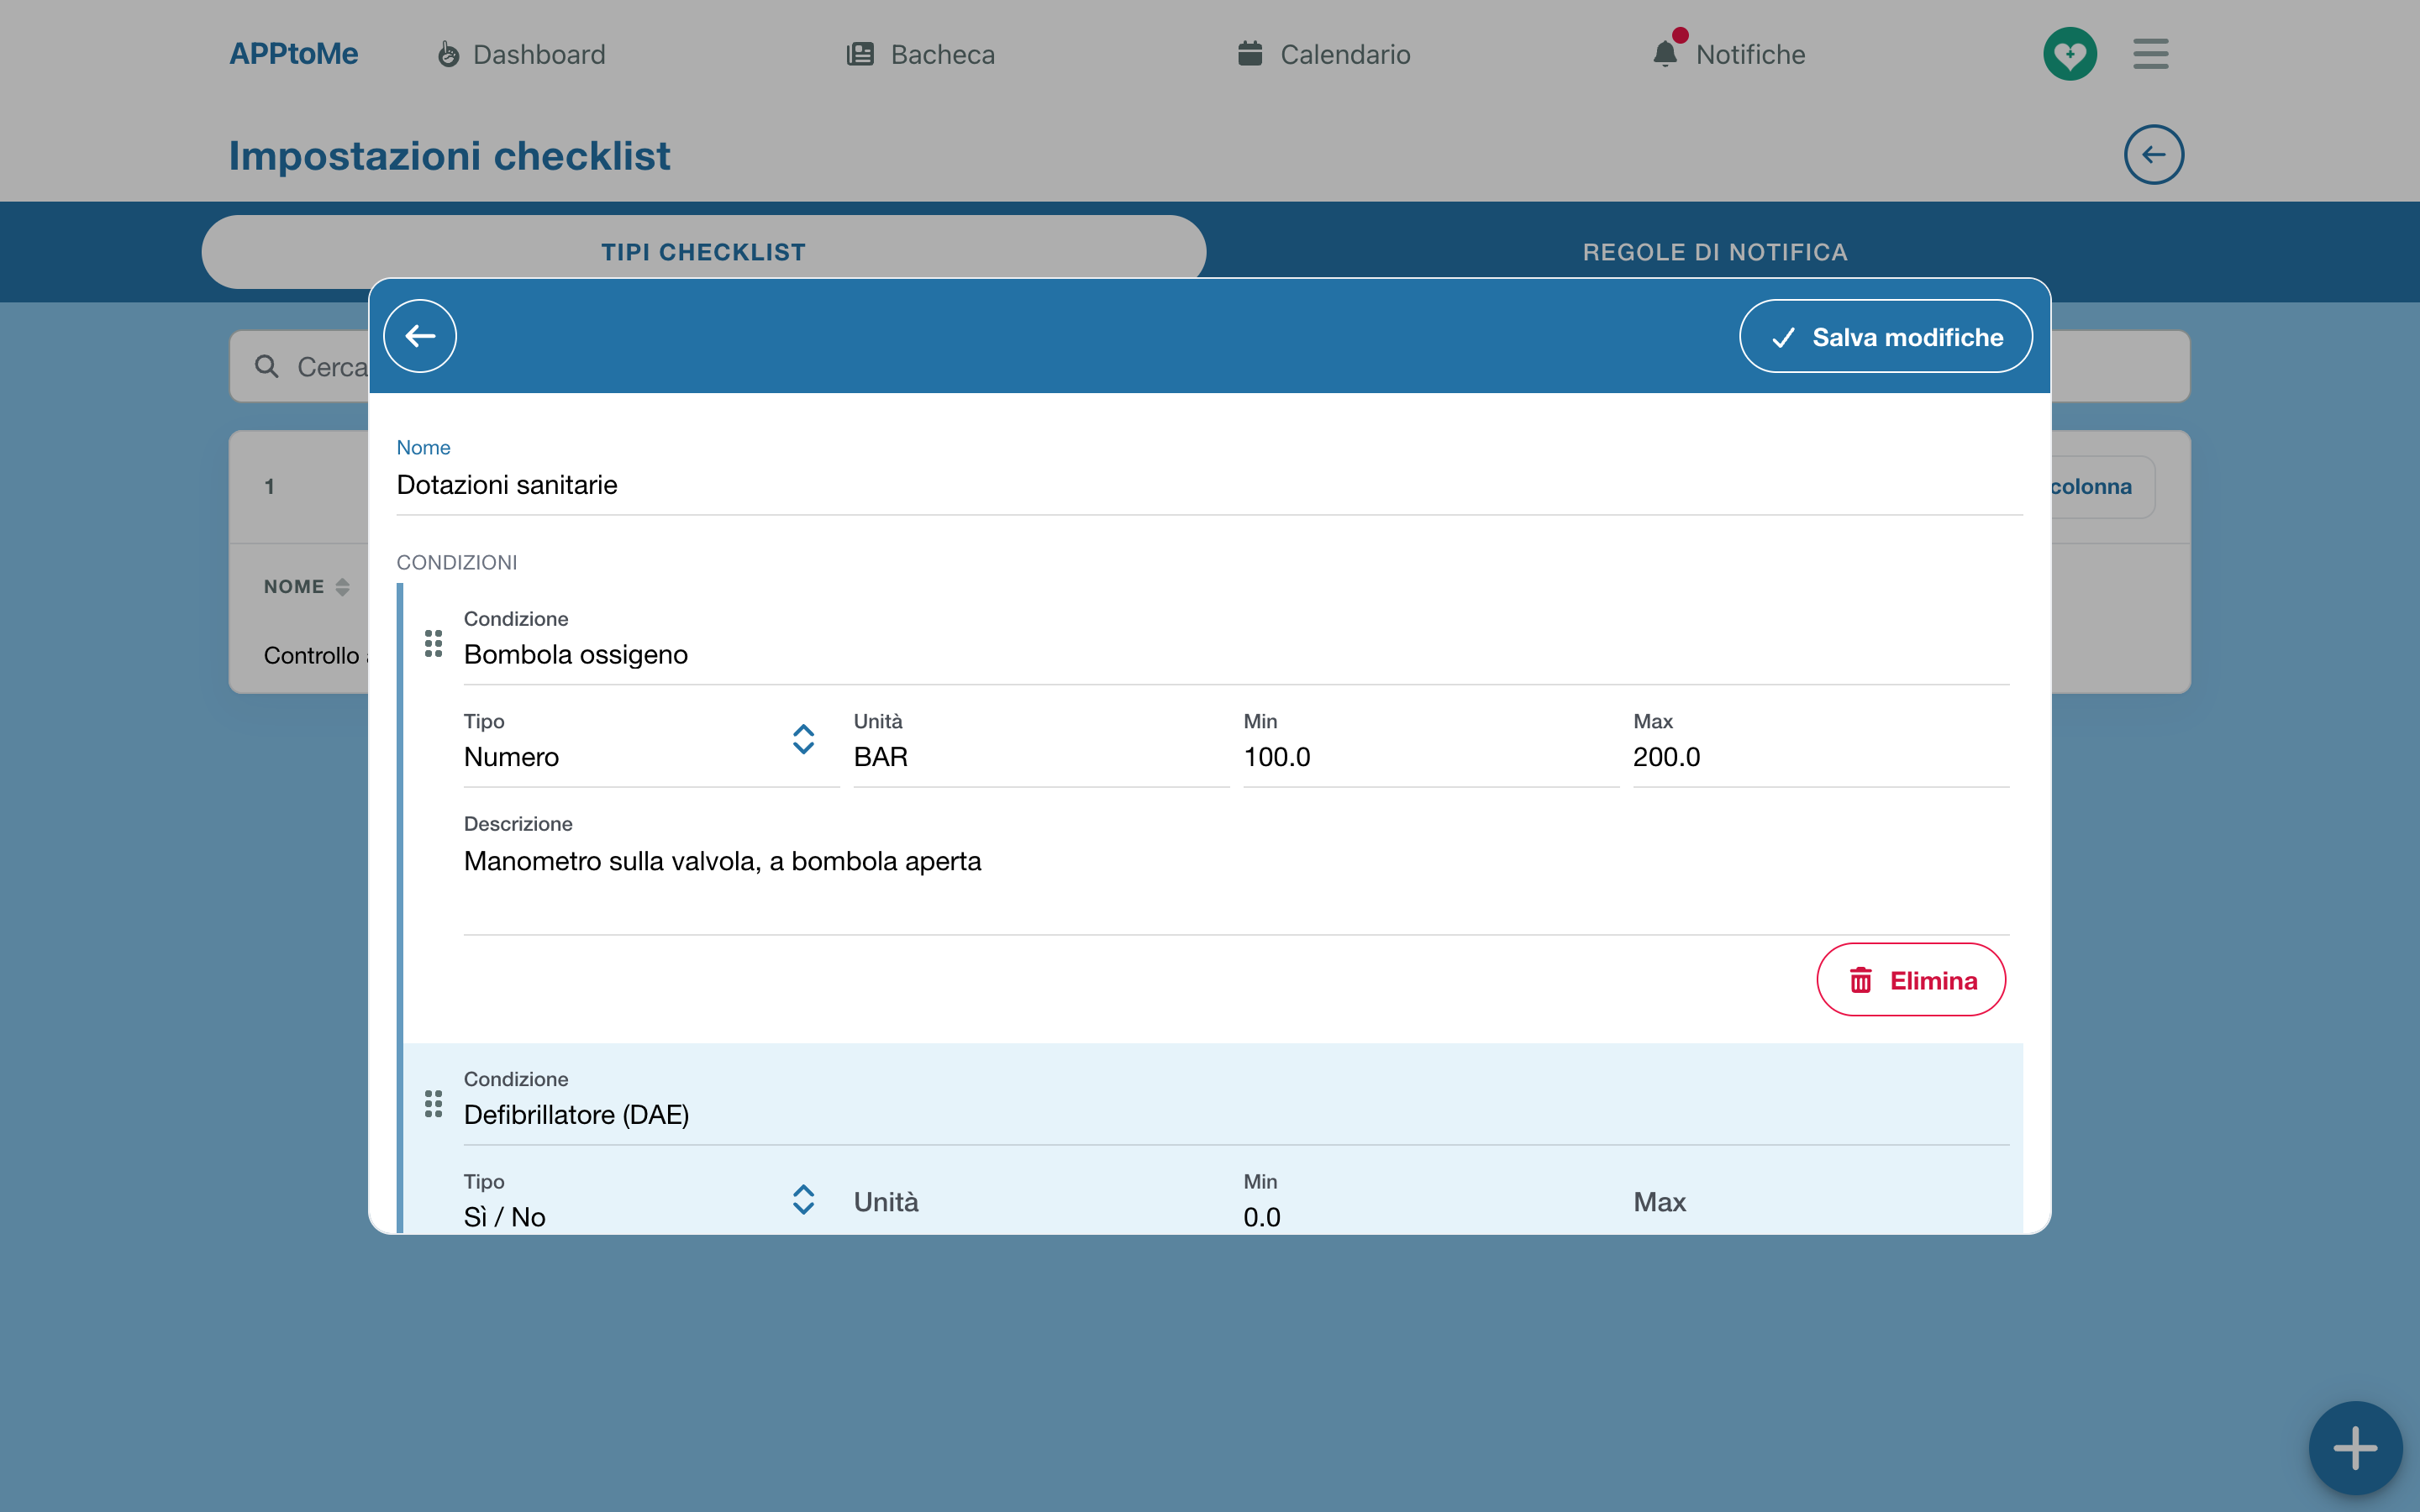
The order of the items is not typed: drag them by the handle on the left of each row and the numbering updates by itself. Sections are reordered the same way, in the Sections tab.
It is the range that makes the Compliant / Not compliant judgement automatic: without it the checklist collects numbers nobody assesses.
The judgement is calculated item by item: a yes/no item is compliant if the element is there, a numeric item if the value falls inside it. The result of the whole checklist is Compliant only if all the items are — one row out of range is enough to make the check not compliant, and that is exactly the point.
Every item's result is frozen together with the value: changing a condition's limits in future, the checklists already filled in keep the judgement they had. Historical comparisons therefore stay readable.
A checklist type can be duplicated and exported: handy for creating a variant of an existing form without redoing it.
2. Linking the checklist
A checklist type comes into play in two ways:
- linked to a shift type — the checklist appears in all the shifts of that type (see Calendars and shift types);
- linked to a vehicle — the checklist follows that vehicle.
If volunteers do not see the checklist in the shift, the link is almost always the missing piece.
How a checklist is born and how it dies
Nobody creates the checklists by hand: AppToMe generates them close to the shift, one for each type linked to the shift type plus one for each type linked to each vehicle assigned. A shift with two ambulances will have two vehicle checklists.
The filling window is the one of the checklist type's two tolerances: it opens before the start of the shift and closes after the end. Within that window only the people with a confirmed availability on that shift can fill it in; the others see it read only.
Outside the window the checklist becomes Expired by itself, even if it had been half filled: what was there stays recorded, but is no longer touched.
Two consequences to bear in mind when you configure the tolerances:
- late tolerance too short = expired checklists one after another, because the check is often done at the end of the service, calmly;
- early tolerance too long = checklists filled in before taking charge of the vehicle, that is checks done on paper.
The evolution of the form follows the same logic: if you add an item to a checklist type, the item appears only in the checklists still open. Those certified or expired stay as they were at closing — which is why they have value as documentation.
Correcting a closed checklist
A certified checklist can no longer be edited by whoever filled it in. With the permission to manage checklists you can act: on checklists already certified or expired the certification button stays, and it is called Re-certify. You reopen the checklist, correct the values and close it again; the outcome is recalculated and the confirmation panel comes with the existing note already filled in, ready to update.
Do it only for objective mistakes: the signature of whoever certified it remains, and a correction after the fact changes a document someone signed.
Notification rules
In the Notification rules tab you link a person to one or more checklist types. They will receive an alert in three cases, all at the moment of closing:
- the checklist turns out not compliant;
- the checklist has expired without being certified;
- the checklist was closed with a note — even if everything is compliant.
The last case is the one people forget: the note is the way a volunteer flags something the form does not provide for ("the stretcher squeaks"), and without a notification rule nobody reads it.
| Field | Type | What it does |
|---|---|---|
| User | choice, required | who receives the alerts |
| Checklist types | multiple choice, required | on which checklists |
Without at least one rule, a checklist reporting a problem stays there and nobody knows: it is the configuration most often forgotten.
Reading the filled-in checklists
In the Checklists tab you find those filled in during the period, with shift, result and notes. Opening a checklist you see the vehicle, the status, who closed it and when, and all the items with the values recorded.
The statuses are Not certified (open), Certified (closed and signed) and Expired (not filled in on time). The overall result is Compliant or Not compliant.
Expired checklists deserve a look: they are not a computer problem, they are a check that was not done.